Today I am sharing colourful fun FREEBIE!
If you're a printer owner or your friend is...or the office your work for
have one :P than this is a delightful treat waiting right here for you!


I made a HAPPY EASTER bunting you can hang anywhere to bring the season in or greet your guests with for the Easter party.
Great for indoor and in the garden or park, just punch out some holes and hang it on a long piece of twine or ribbon.


They're round images to be use as
a gift tags or a decor.


Click the links below to print them out!


- bunting & tags 1 
- bunting & tags 2
- bunting & tags 3
- bunting & tags 4


KEEP CALM print might be placed in the picture frame, click the link to print that too!

- KEEP CALM


The round images can be use as a simple cake toppers ;)
Here I cut off the black edge to make them a bit smaller.


If that party of yours including the EGG HUNT  for the youngsters too than why not to print out some arrows to make it more fun while looking for the precious surprises!


Use bamboo skewers and sticky tape to stuck them into the ground.


Print arrow signs out here


Simple idea of using little recycling garden pots as a treat baskets, just add craft cleaning pipes!


And here a cute finish of today's post - treat matchbox wrappers!
Some of you might still remember my Matchbox love wrappers, this is the same way these been wrapped around match boxes.
So sweet, I have to say :)


Tulip wrap might be also use to wrap small gifts like a bar of chocolate.
Click below to print it!

- tulips wrap
- matchbox wrappers


I hope you will find them fun and useful this Easter :)


The most important of Easter craft of all - eggs decorating!
How not to love this, ones a year we can all be artist thanks to an egg :)

Hundreds of ideas over the internet, today I give you 8 done by us.
Some needs a patient hands and some just a pinch of love.
There is few to make with your kids and few to make by cup of coffee with your best friend ;)

We usually use foam eggs which I found very versatile plus they will never brake :)
Blown out eggs are more delicate option but adding extra fun for kids when blowing an egg out.
We then make a scramble eggs of course, nothing gets wasted!
If you never tried that have a look at the instruction here.

Lets check them out!


1. Felt and fabric cut offs

- egg (blown out or foam)- felt and fabric cut offs
- PVA glue


Almost like a puzzle/mosaic pieces Ela was able to do it by herself at the age of 4 proving this technique is very easy ;)


2. Magazine scraps


- egg (foam or blown out)
- magazine/newspaper scraps
- PVA glue
- clear nail polish (optional)
Very easy one.
Choose the pages of the magazine you like and tear it to little pieces.
Try to add some key words for extra interest.
Using lots of glue stick them on egg by overlapping slightly.
Smooth the surface with your fingers.
Let it dry then paint it over with clear nail polish to add a nice gloss finish if you wish :)


3. Drawing pins


- foam egg
- drawing pins


Easier the it looks this technique is the one you can chat to your friend and drink coffee at the same time :)
Starting from the top of an egg push the pins by overlapping them.
I did that before when making acorn ornaments, but then starting from the middle.
You can leave them shiny as they are, I treat some of them with some white acrylic paint using dry brush.

They have that "dragon's egg" look :)


4. Glitter

- egg (boiled or blown out)
- glitter
- PVA glue


Dye your eggs any way you want first or leave it white if you use a duck egg.
Here I use such an blown out egg but dyed with boiled red cabbage leaves and vinegar mixture.
Yes, they will come out blue :)

Next draw a simple patterns using PVA glue and thin paint brush on one side of an egg.
Sprinkle with glitter, blow off an excess and leave it to dry before do the same on the other side.
Easy peasy!

5. Cotton thread & pins


- foam egg
- large headed pins
- cotton thread


I painted my foam egg black to add an extra contrast with the thread ;)

Start with pushing pins in few random places then have fun with the threads.


6. Wrapping paper & tissue scraps

- egg (foam or blown out)

- wrapping paper of tissue scraps
- PVA glue


Same as with magazine scraps stick them to the egg surface using lots of PVA glue and smoothing with your fingers.


No, matching plaster and nail polish wasn't intentional :D


7. Speckled with paint


- egg (foam or blown out)
- acrylic paints (pastel colours + dark brown)


I first painted my foam eggs with acrylic paint, I made some pastel shades using lots of white colour.


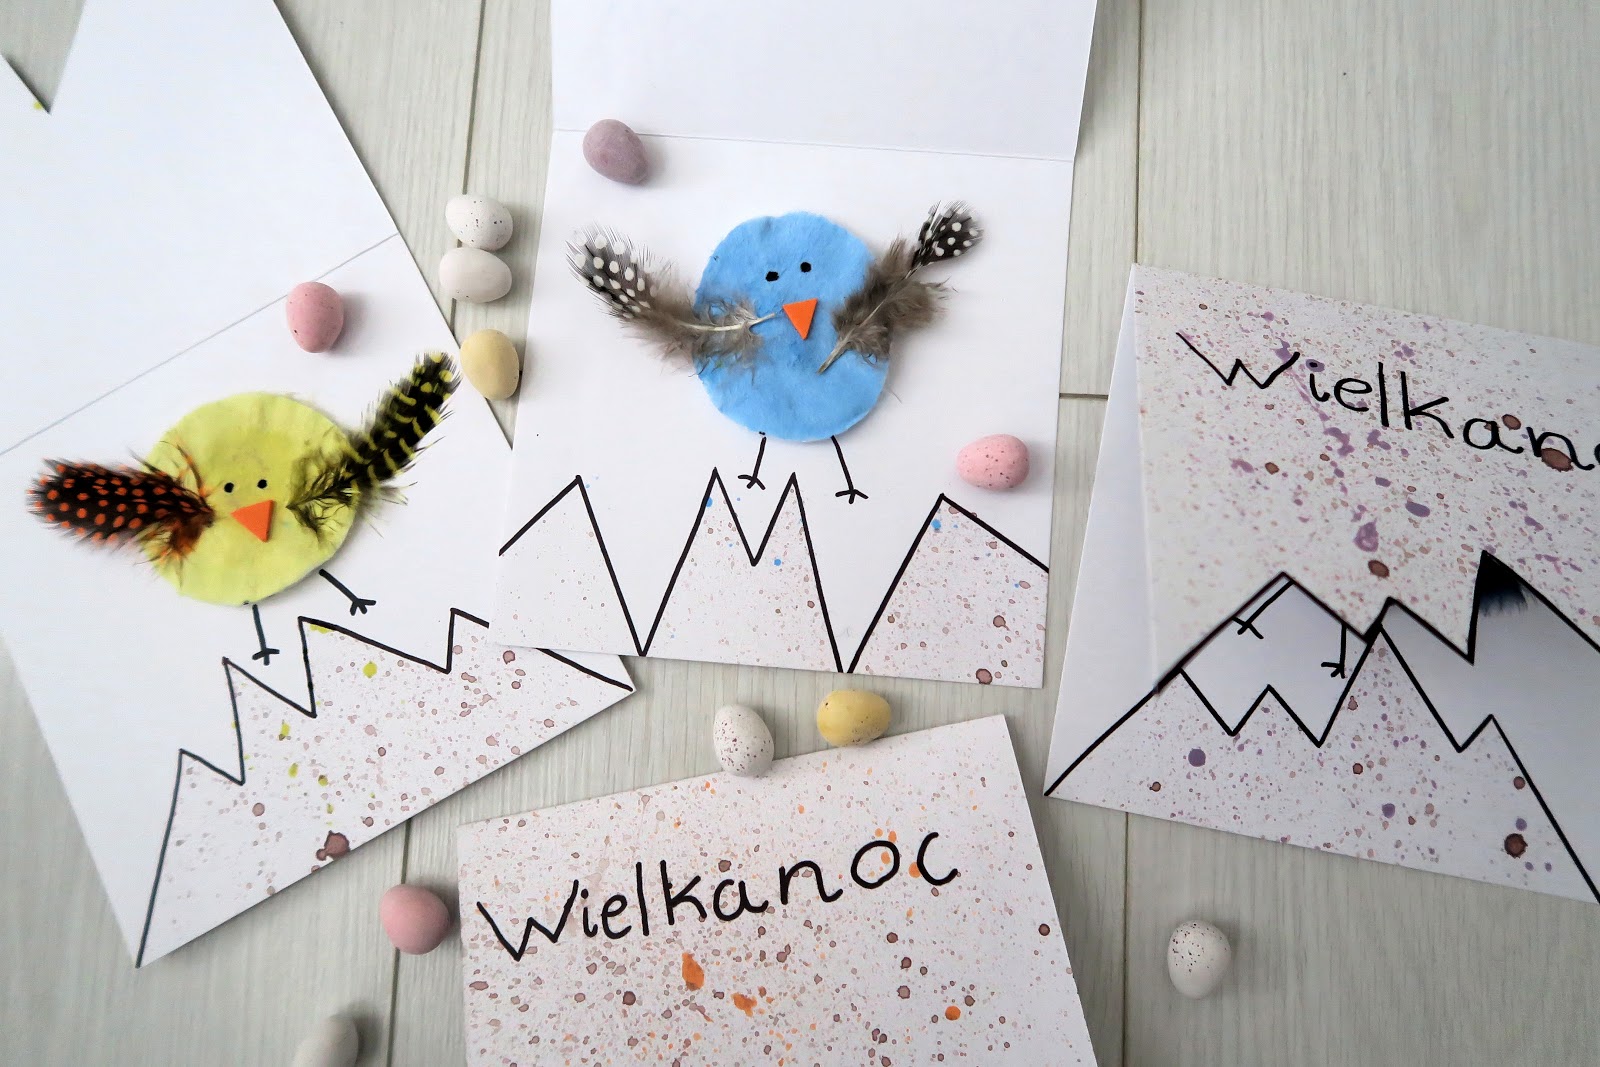
After they get dry we sprinkle it with brown paint on one side using a tooth brush, just the same when we make our hatching egg cards ;)
After drying other side gets the treatment too.


This one was so much fun, I love the result!


8. Sharpie patterns


- egg ( boiled or blown out egg)
- Sharpie pens


Here I draw on white blown out duck eggs using my ever favourite Sharpie permanent pens, the black one is a foam egg painted black with patterns using metallic Sharpie pens.
This is clean and easy way to decorate your eggs, kids can join in too ;)

We hope to inspire you to try some of them this Easter!


Today something simple cheap and effortless, a craft memory from my childhood...
A piece of cardboard cut into an egg shape and decorated with anything from mom's drawer :)
That was it, it's what I needed as a child to jump over the moon at Easter!

So why not to take this to our kids today and have an hour of silence, it's so easy ;)
We did it last year and will use it over and over again as one of our Easter decorations in the house.

But what we actually use instead of cutting a piece of cardboard...


Yes! That removable window from the box of tissues.
No cutting, pure joy...thanks to Ela, it was her idea :)

If you're in sneeze season than keep them!
Otherwise cut the shapes out of thick cardboard.

Now gather all the stuff which might work :

- buttons
- yarn/thread
- ribbons
- decorative paper scraps
- sequins


- PVA glue
- sticky tape
- bamboo stick


A little brief, just so you remember how it's done ;)


Meanwhile cutting off  any excess ...


I've been making mine too.


 We then added a bamboo sticks using tape so they can be display in plant pots for example.


                                Simple as that :)


Hello!
Easter is getting closer fast so it's time to get creative again!
If you're a parent then you can tell how much kids love this time of year.
We are awaking from the Winter season, looking for warm sunny colours in nature and craft drawers :)
It is also the time to send some greeting cards and if you  love to make them yourself as much as we do than showing you few ideas, from the past and recent .
All of them can be done involving children ;)


So lets have a look at
                          5 easy Easter card ideas!


1.  Potato stamp card 
Well known easy technique ;)


The result is very modern thanks to the black paint as a base, I really love this simplicity :)It can be done in many  ways.


2. 
Hutching chick card


Materials :


This one comes in two stages.
Stage 1 - card 
preparing 
Stage 2 - chick making


I cut the card in zigzag to imitate an egg crack.


I wanted a speckled egg looking card so Ela get on with sprinkle them with brown paint mix using an old toothbrush.
She the choose another colour and added some more spots so we ended with 4 different speckled cards.
This idea is absolutely perfect for toddlers too, they will love that messy part ;)


I wanted the crack to be more visible so I drew on the crack edges on the inside and outside of the card using black felt pen.


Ela then made a chicks :)


She then add lettering.


Wielkanoc(Polish) - Easter

3. 
Finger print tulips meadow card

Your kids will love dip they fingers in paint for this one :)
Get acrylic paint in colours of your choice and make several dots using finger tips.
Wait for it to dry, then using black felt tip pen draw tulips.


You can leave the space for some "Happy Easter" lettering on top or bottom of your card.


4. Finger print bunnies card


Almost the same as with tulips.

Using finger tips make two small dots for bunnies heads and two big for their bodies.
Leave it to dry and use your imagination to draw them...or let your child to do it if you not that confident about it ;)


5. Chick in the meadow card


For this card we did the same chicks made of cotton pads as before and leftover paint for finger prints.


The same as with tulips we did paint spots first using our finger tips.
Leave it to dry and draw the flowers the glue on your chicks :)


 We hope this will inspire you to make some cards yourself while having fun ;)